
How to install kitchen cabinets
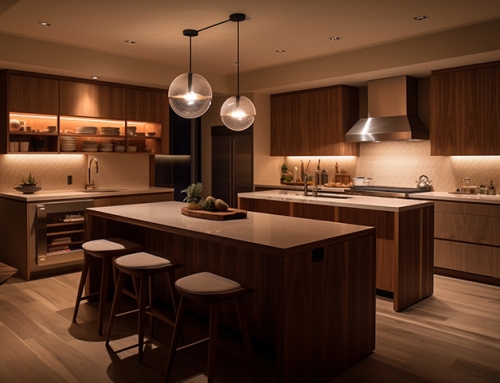
Make Your Kitchen Look Good & Spacious: The kitchen’s most essential part is a whole lot of cabinets. Cabinets help you to organize and keep all those blenders, mixing bowls, plates organized and neat so obviously, it’s worth taking the time to pick the right ones. Once you’ve changed your kitchen cabinets and selected the right ones for you, the decision you need to make is whether to build them yourself or seek professional help. This is what you need to know before starting work.
What You Need to Install New Cabinets
Nothing detracts from the fun and efficiency of an installation more than several trips to the hardware store. To facilitate the process, prepare all tools and materials in advance. This is what you need:
Equipment needed:
- Level 4 ‘or 6’
- Measuring tape
- pencil
- Drill
- Drill bits
- Stud finder
- Tongs/clamps
- A hammer
- Nails
Materials:
- A diagram of the desired kitchen layout.
- Wooden Block Packages/ Bundles of wood shims
- A box of screws
- Ledger boards are equal to the length of the cabinets
How To Install Kitchen Cabinets
The following steps will help you install tall units in your kitchen:
Define your measurements and mark the wall
This first step will help you prepare the installation area for the job. Use a tape measure to check the height of the base units and draw two lines. The lines are 34½ “and 54”, respectively, from the highest point on the floor where the lower cabinets and closets will be placed. Draw a horizontal line on the wall to use as a guide when hanging the cabinets. If your floor is not level, be sure to measure from the highest point along the wall.Once you’ve specified where to place the wall cabinets, use the stud finder to locate the wall studs. Mark them on the wall and test them with a hammer. It is important to make sure the studs are positioned in the correct location where you plan to bolt the cabinets. This is because the wall studs are essential to support the weight of the cabinets.
Set up your ledger
Place the ledger on the wall and screw it onto the marked studs. This card is temporary and facilitates the entire installation process, as it acts as temporary support for the cabinet during installation. Once you’ve backed up the ledger, remove the cabinet doors and hardware. This makes them lighter and easier to install.
Hanging wall cabinets
Securely attach and lift all cabinets for dash mounting. Use clamps to secure the posts (the vertical pieces at the front of the cabinet).Use the drill bit to secure the two cabinets together on the stud. Then put one screw at the top and bottom and the rest at the front and back where the cabinets meet.After the cabinets are connected to the main book board, check that they are plumb and level. If necessary, you can even support the cabinets. This will help level cabinets that are nailed to an uneven surface. Next, place the cabinets on the wall where you marked the studs. Once the cabinets have been positioned correctly, you can begin to install all the doors and hardware. Finally, you can delete the table from the general ledger.In addition to setting up the dash, you can repeat this process to install the base cabinets. By following the simple steps above, you should be able to install the cabinets yourself. However, for luxury cabinets with several designs and colors, you should contact Houston Custom Carpets. They will help you in deciding which cabinets should be installed according to your needs and kitchen interior and will do all the work, so you don’t have to waste too much time and energy on it. As they are doing it for years in Houston, they know what you want.